Walkthrough – Part 3
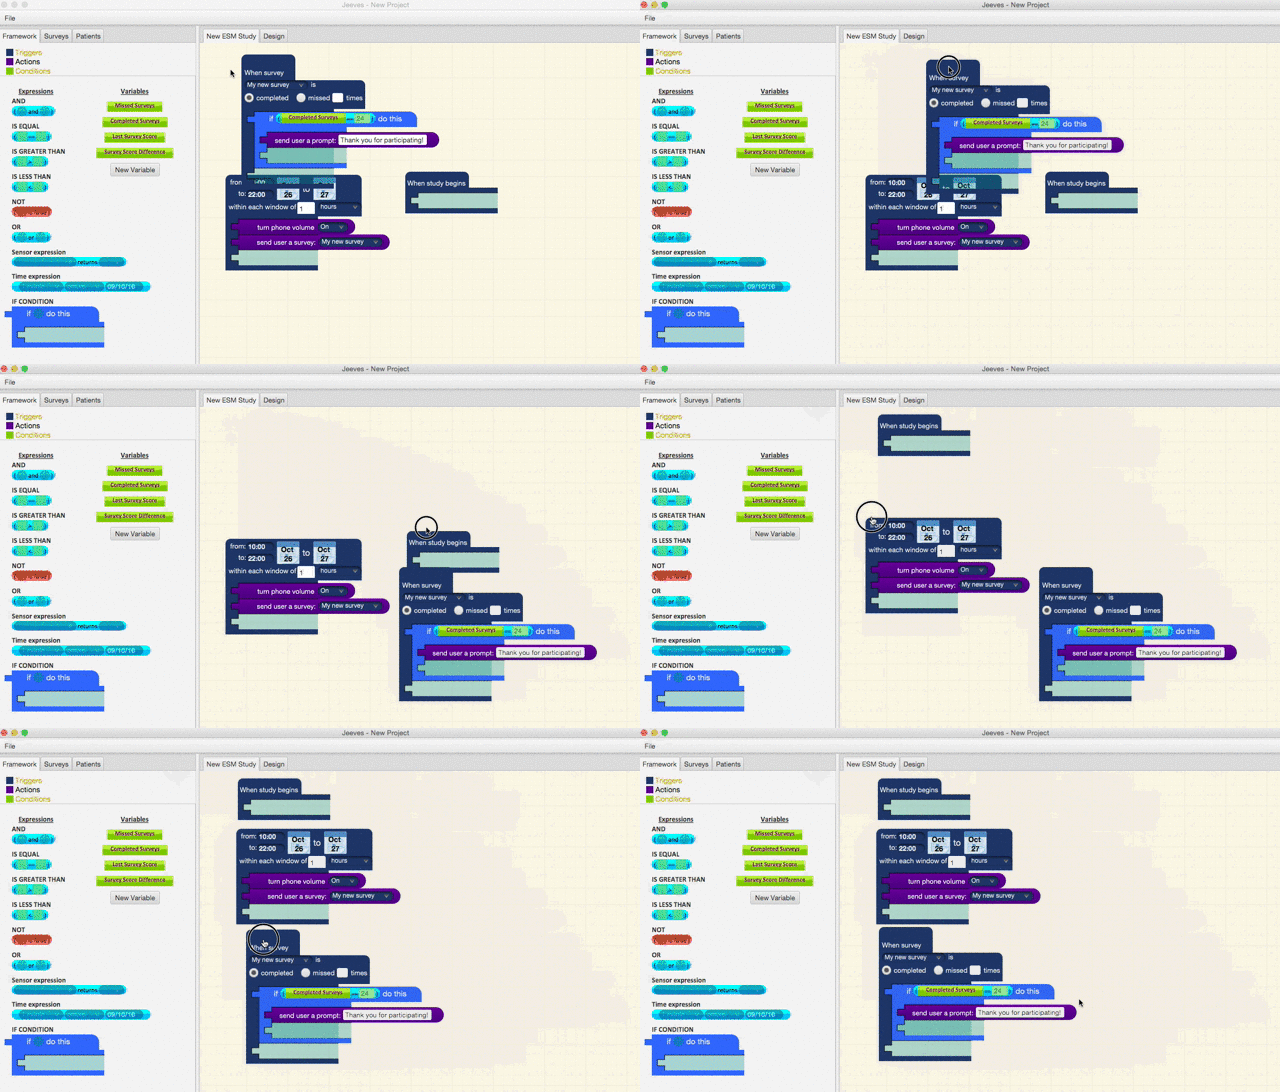
Before we do anything else, our canvas is starting to look a bit cluttered. We should rearrange our triggers to make things a bit clearer (of course, yours might already be arranged nicely!).
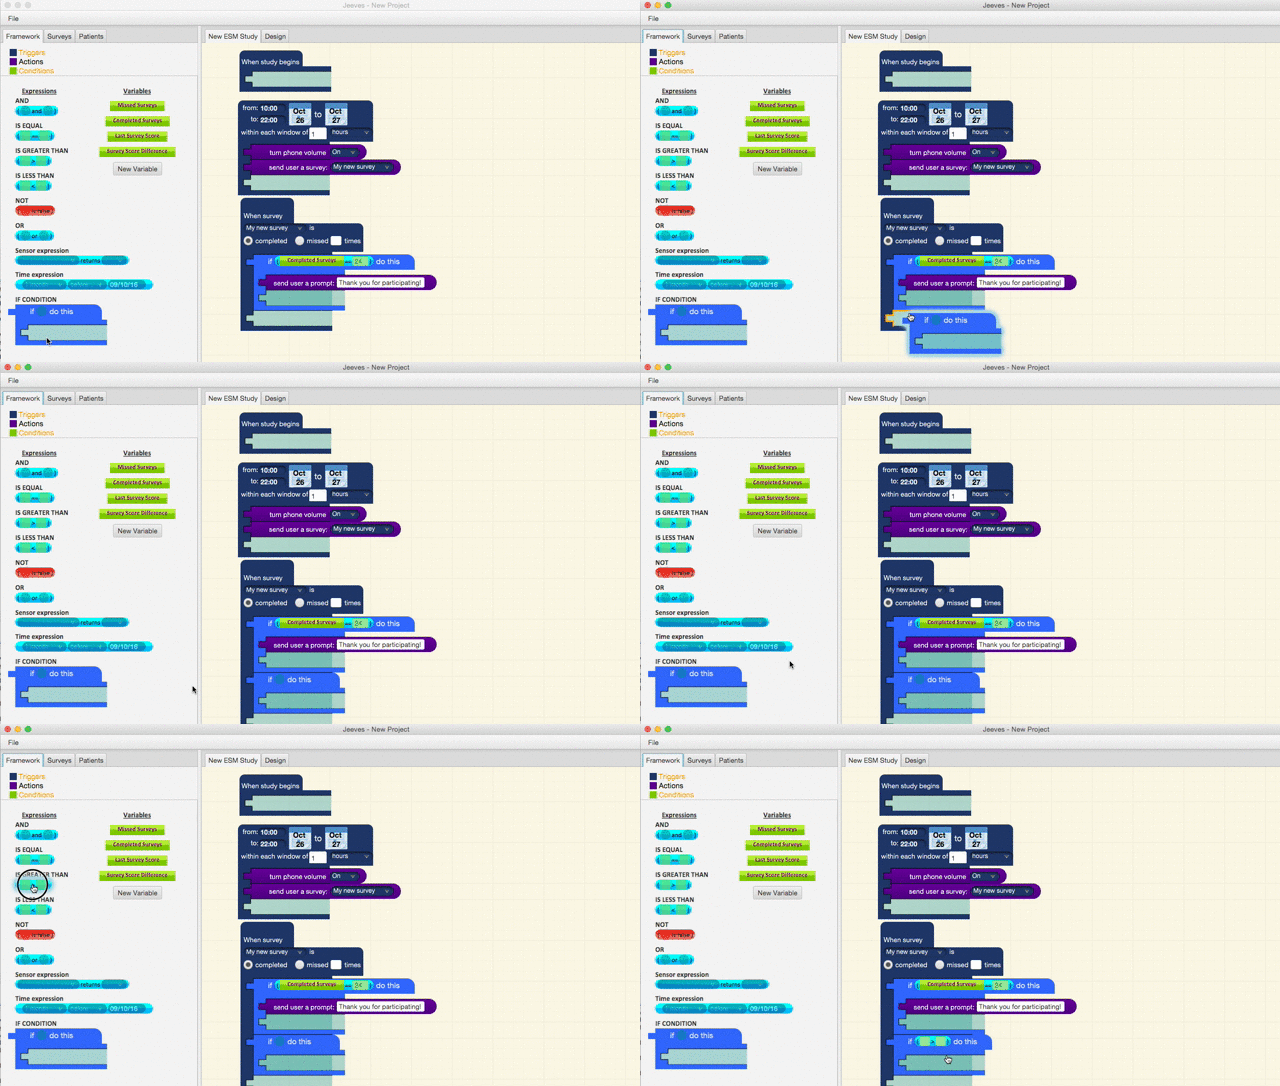
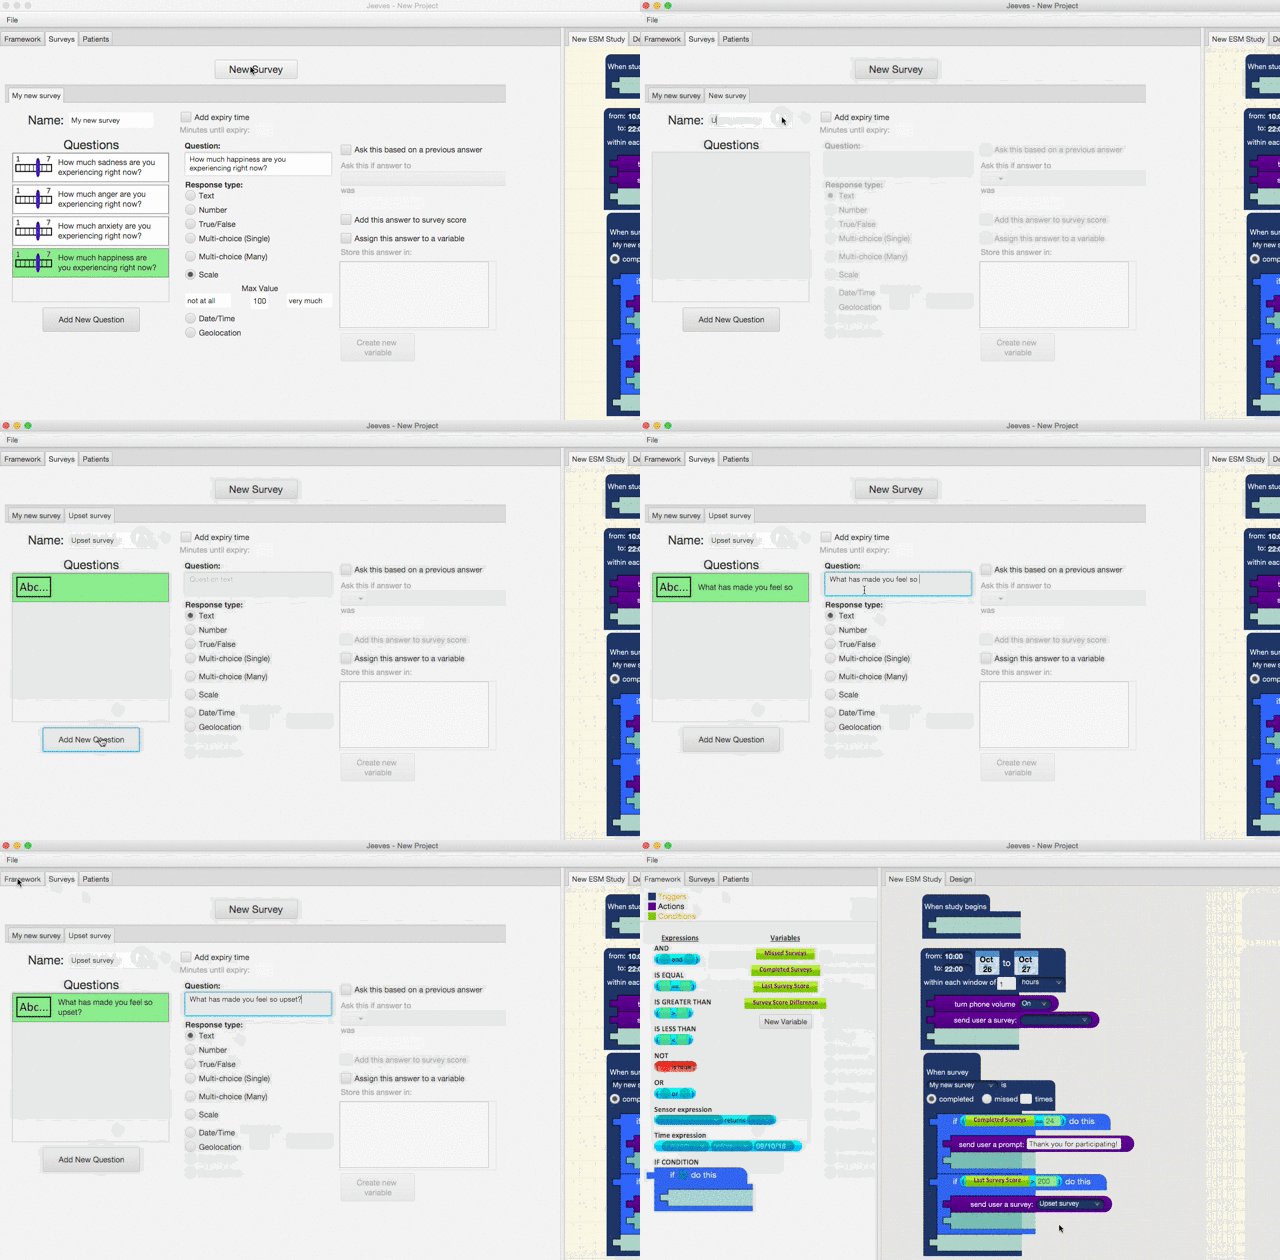
Next we want to add another condition that checks whether the last survey score was greater than a certain value, say, 200. Drag a new IF CONDITION into the brackets and an IS GREATER THAN expression into the condition.
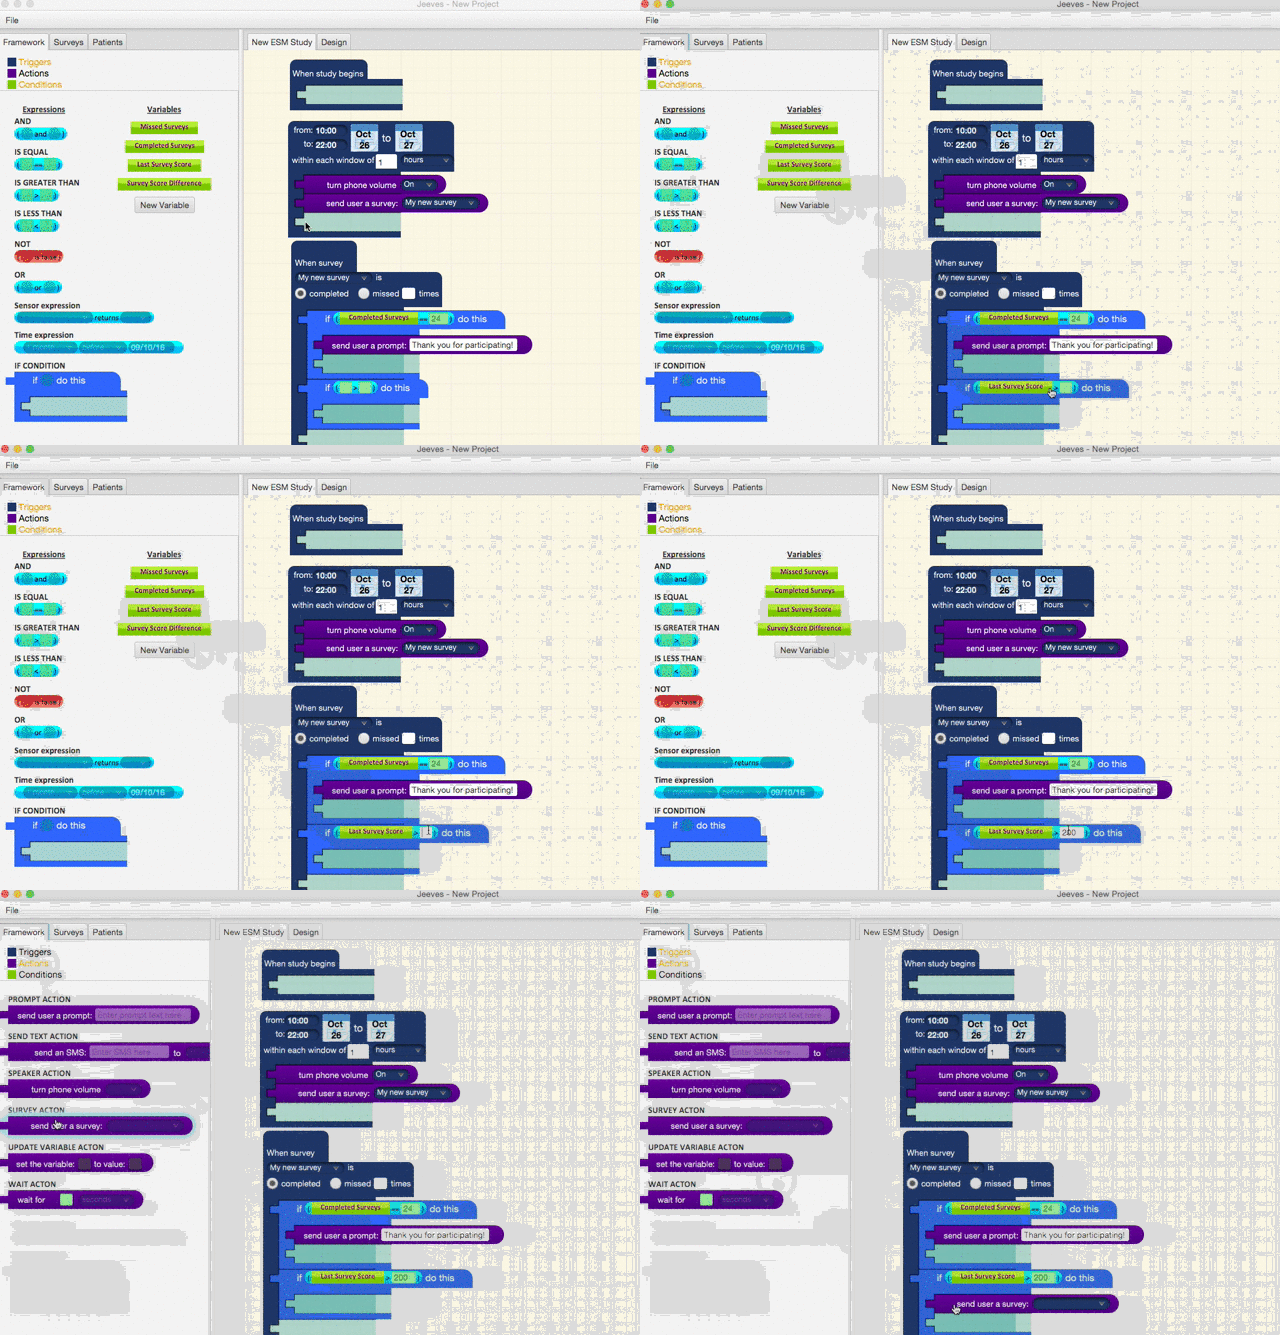
The ‘Last Survey Score’ variable stores, funnily enough, the score assigned to the user’s last completed survey. Drag this into the left side of your expression, and enter 200 into the right side. Then, we want to send the user a new survey if this is true, so drag a SURVEY ACTION into the brackets:
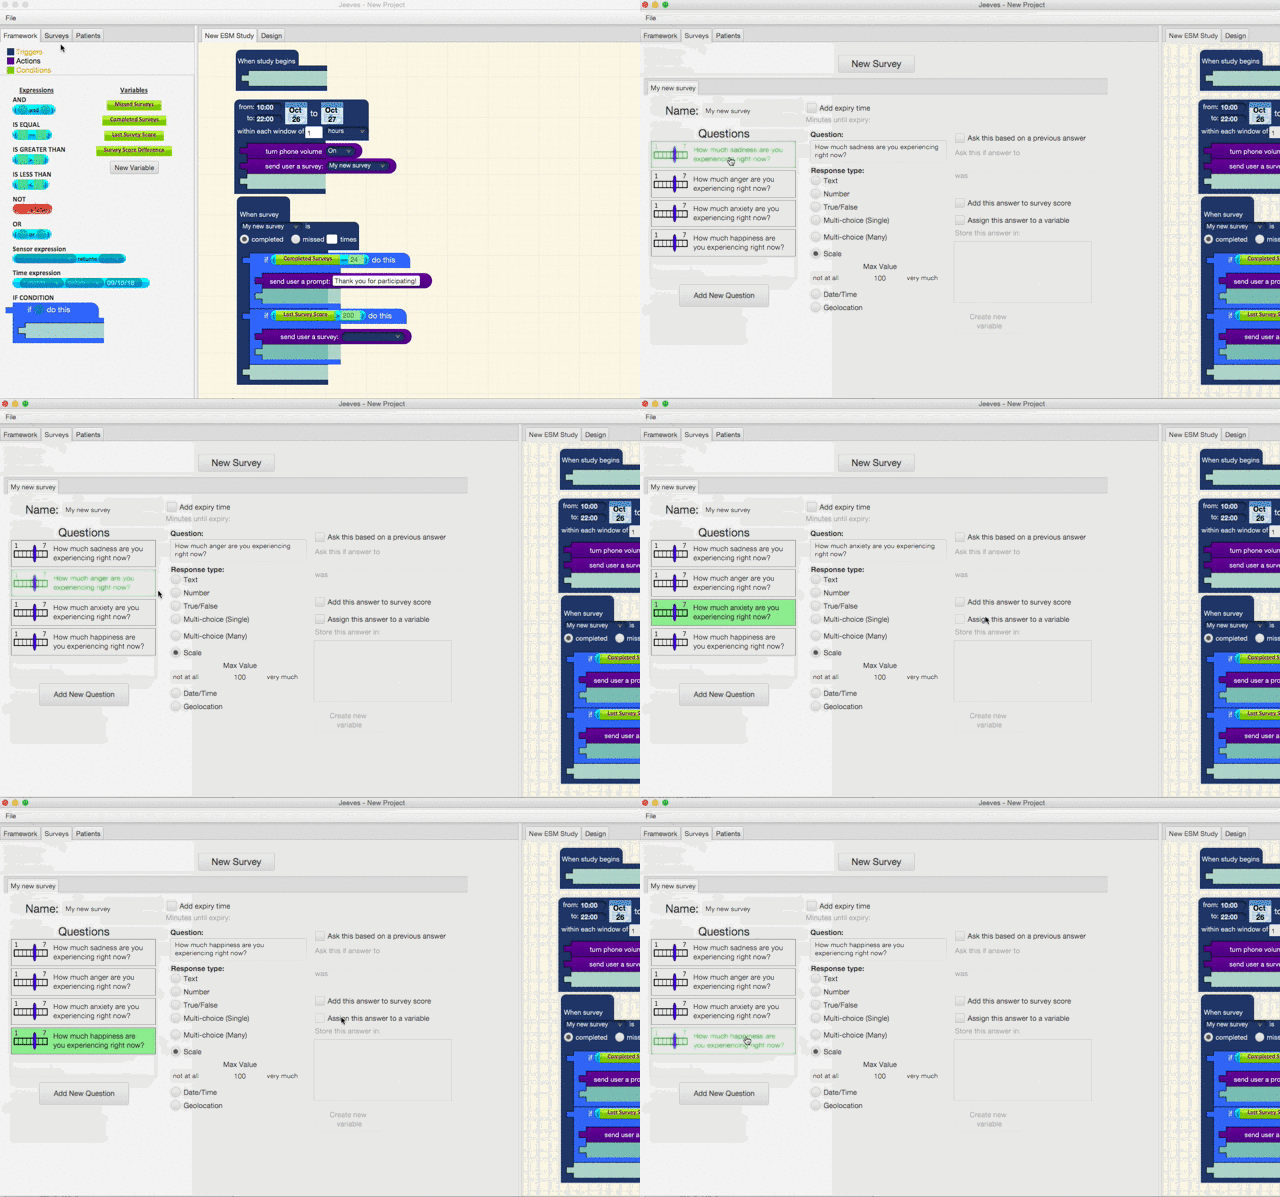
There are still a couple of things to do – first, we need to add the new survey, and second, we need to add the answers of certain questions to the ‘survey score’. Go back to the survey and tick the ‘Add this answer to survey score’ for the first three questions (we don’t want to count the user’s happiness in this score!)
Then, let’s make a simple survey that asks the user to describe what has made them feel upset.
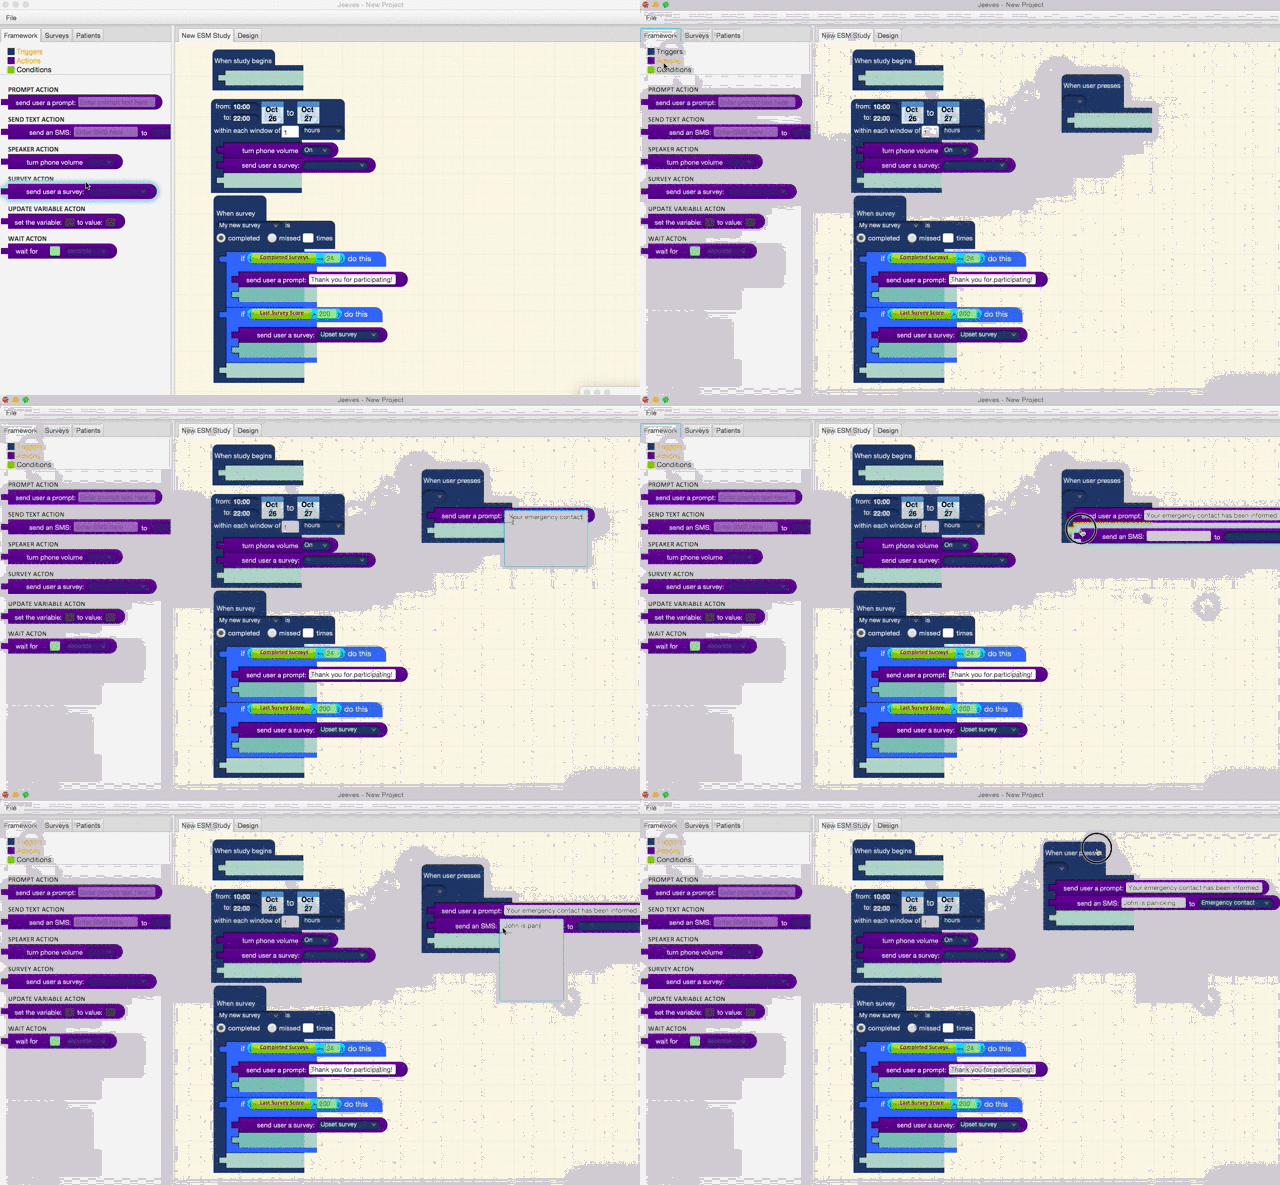
Last but not least, we might want to add an option for the user to press a button that sends a message to an emergency contact in the event of a panic. To do this, we need to add a BUTTON TRIGGER. Inside this, we’ll need a PROMPT ACTION and a SEND TEXT ACTION, with appropriate messages, like so:
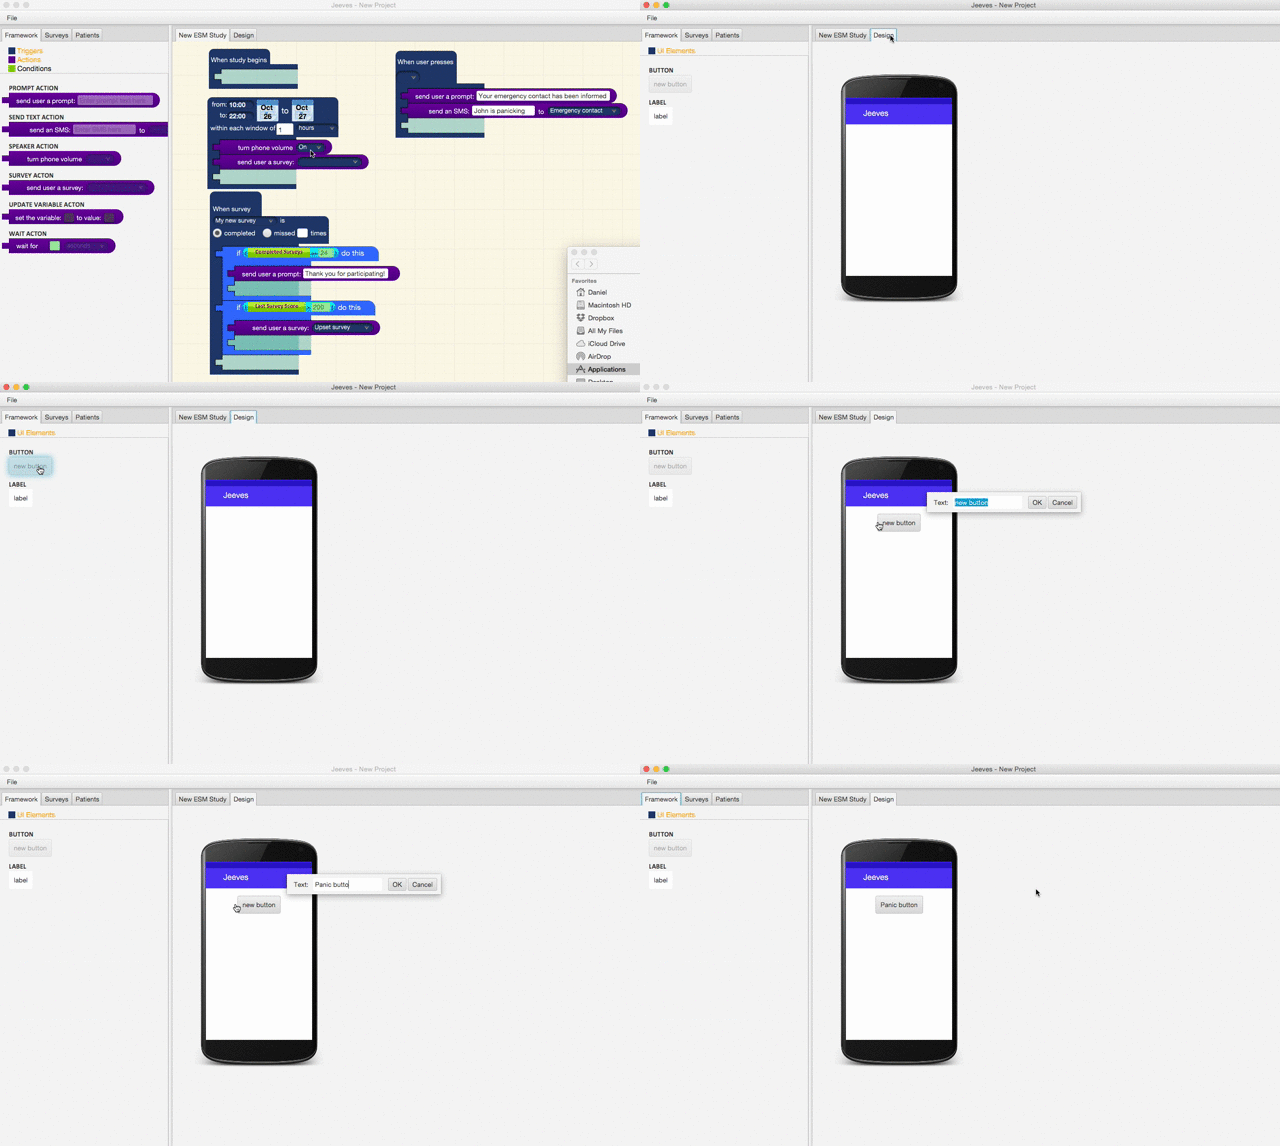
Of course, there are no buttons to select because we haven’t made any yet! This can be done by clicking on the ‘Design’ tab. A new button can be added to the interface by clicking and dragging it onto the phone screen as shown below:
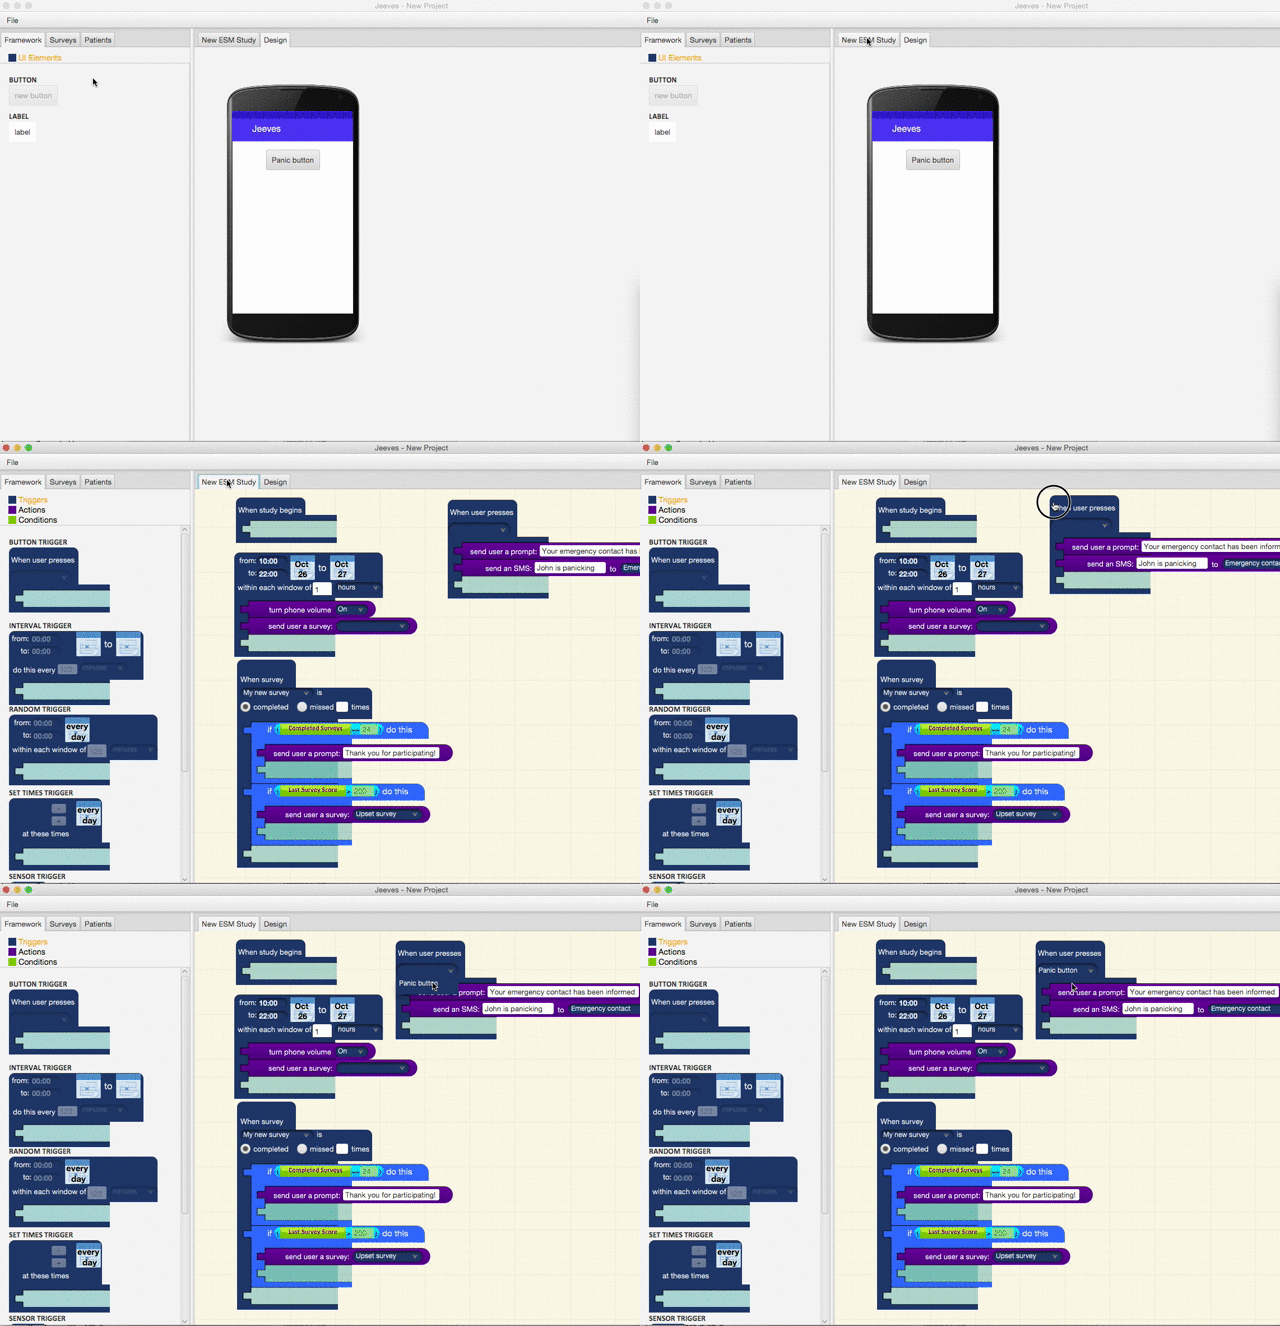
If we now go back to the study tab, we can allow these actions to be executed when the user presses the ‘Panic button’:
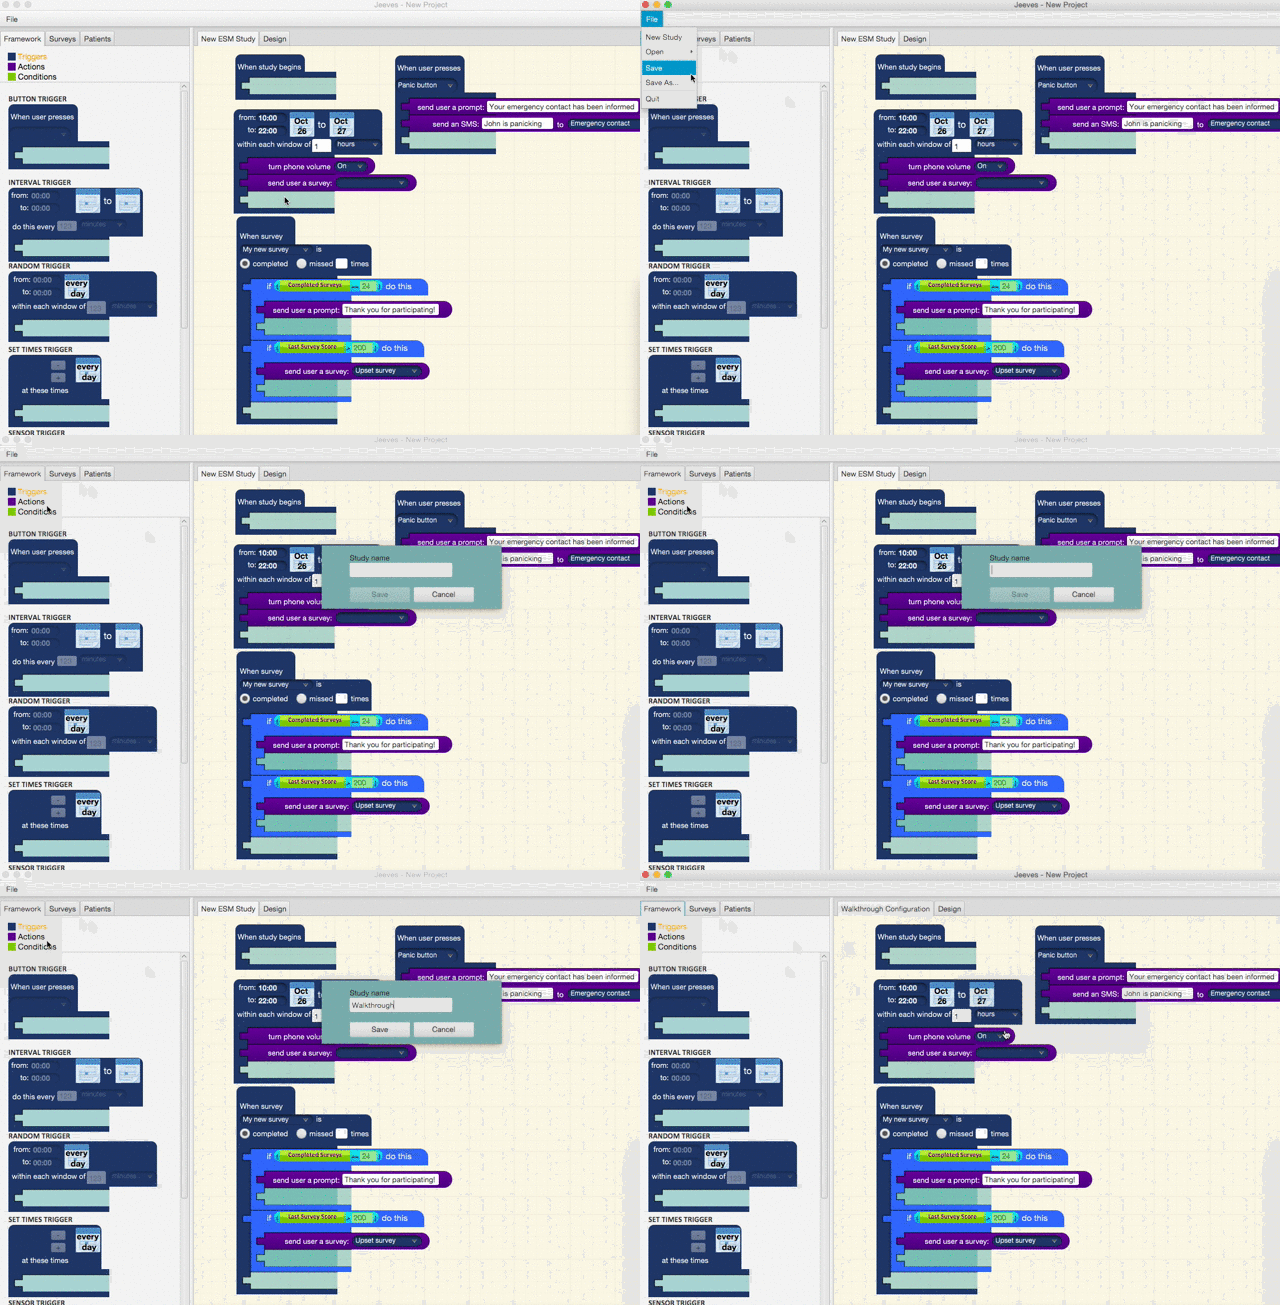
That’s all for the step-by-step guide. Now make sure to save your work like this:
If you’re ready, please move on to Exercise 2!

